
8 Plywood Ceilings for a Porch or a Bunk Room

On this page15 sections
- Choosing the right plywood
- Planning the grid
- A clear-finished birch grid in a bunk room
- Reveal joints for a modern look
- Battens over the seams
- A warm stained porch ceiling
- Painted plywood for a bright bunk room
- A plywood ceiling with a single beam
- Lights recessed into the grid
- A plywood ceiling over a sleeping loft
- Fastening panels overhead
- Finishing tips
- Care and maintenance
- Quick answers
- A warm ceiling on a budget
A wood ceiling makes a room feel warm, sheltered, and a little like a cabin, but solid tongue-and-groove planks take time and money. Plywood is the shortcut that does not look like a shortcut. Good plywood panels have clean, even grain, go up in large sheets, and can be finished in anything from clear oil to a dark stain or paint. Laid out with care, a plywood ceiling looks modern and deliberate, closer to a Scandinavian cabin or a mid-century beach house than a basement.
This guide is about flat panel ceilings that show off the plywood itself. If you prefer the traditional grooved look, the guide to beadboard ceiling ideas covers that style. And for the rest of a shared sleeping room, from bunks to storage, see bunk room ideas. Here the focus is on choosing panels, planning the grid, and finishing the ceiling in a porch or a bunk room, two spaces where a warm, durable ceiling makes a big difference.
As an Amazon Associate I earn from qualifying purchases.
Choosing the right plywood
Not all plywood is suitable for a visible ceiling. Construction-grade sheathing has knots, patches, and rough faces, which look unfinished. For a ceiling, look for:
- Cabinet-grade or appearance-grade panels. The face veneer is smooth, with few or no patches. Birch, maple, and pine faces are common choices.
- Baltic birch or similar multi-ply panels, which have many thin layers and attractive, void-free edges. Good for exposed reveals.
- Exterior-rated plywood for porches. Exterior glue and a moisture-tolerant face are important for covered outdoor spaces exposed to humidity.
- Thinner panels for weight. Quarter-inch or three-eighths-inch panels are lighter and easier to lift overhead. They need closer fastening and solid backing.
Buy all panels for one ceiling at the same time and check them for matching color and grain. Plywood from different batches can vary, and a mismatched panel stands out on a ceiling. Store the panels flat in the room for a few days before installation so they adjust to its humidity.
Planning the grid
The layout of the panels is the single biggest design decision. A ceiling with the seams arranged in a clear, even grid looks intentional; one with random seams looks like patchwork.
Start by measuring the room and drawing the ceiling to scale on paper. Center the grid in the room so the panels at each edge are the same width. Avoid narrow slivers at the walls. If the room is long, consider cutting the panels into smaller equal pieces, such as 2 by 4 feet or 4 by 4 feet, for a more regular pattern.
Plan around light fixtures, fans, and vents. Ideally, place a fixture in the center of a panel or at a grid intersection, not just off a seam.
Mark the joist locations on the walls and the ceiling. Every panel edge needs solid backing, so you may need to add furring strips or blocking between joists to support seams that fall between them.
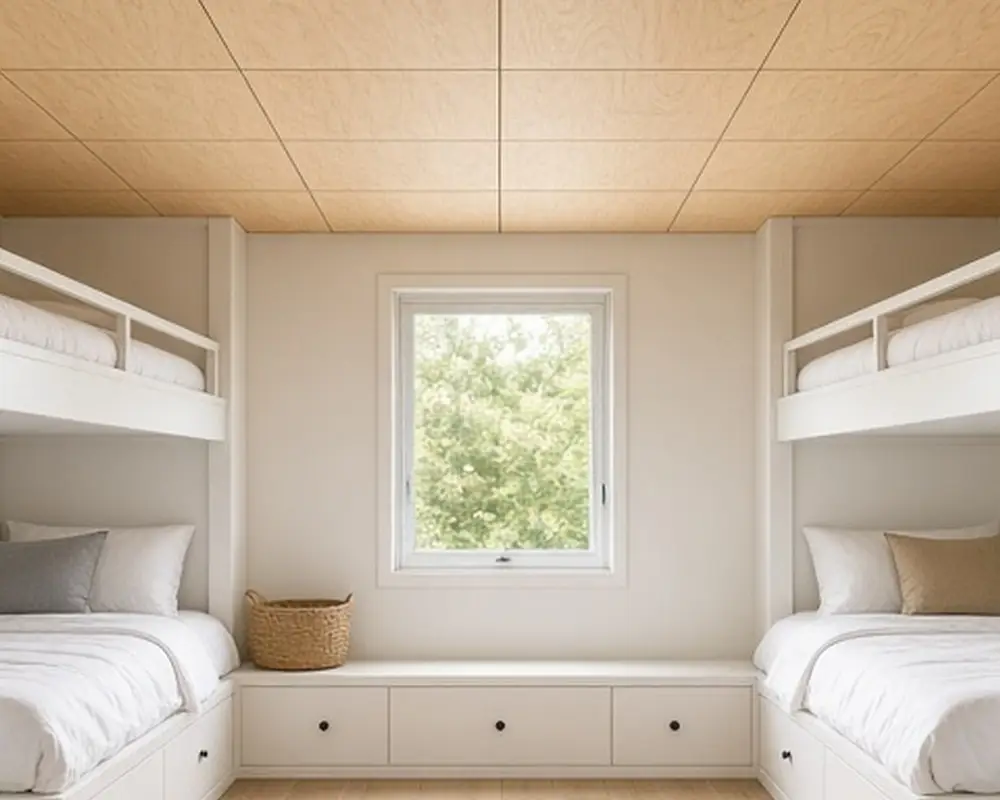
1. A clear-finished birch grid in a bunk room
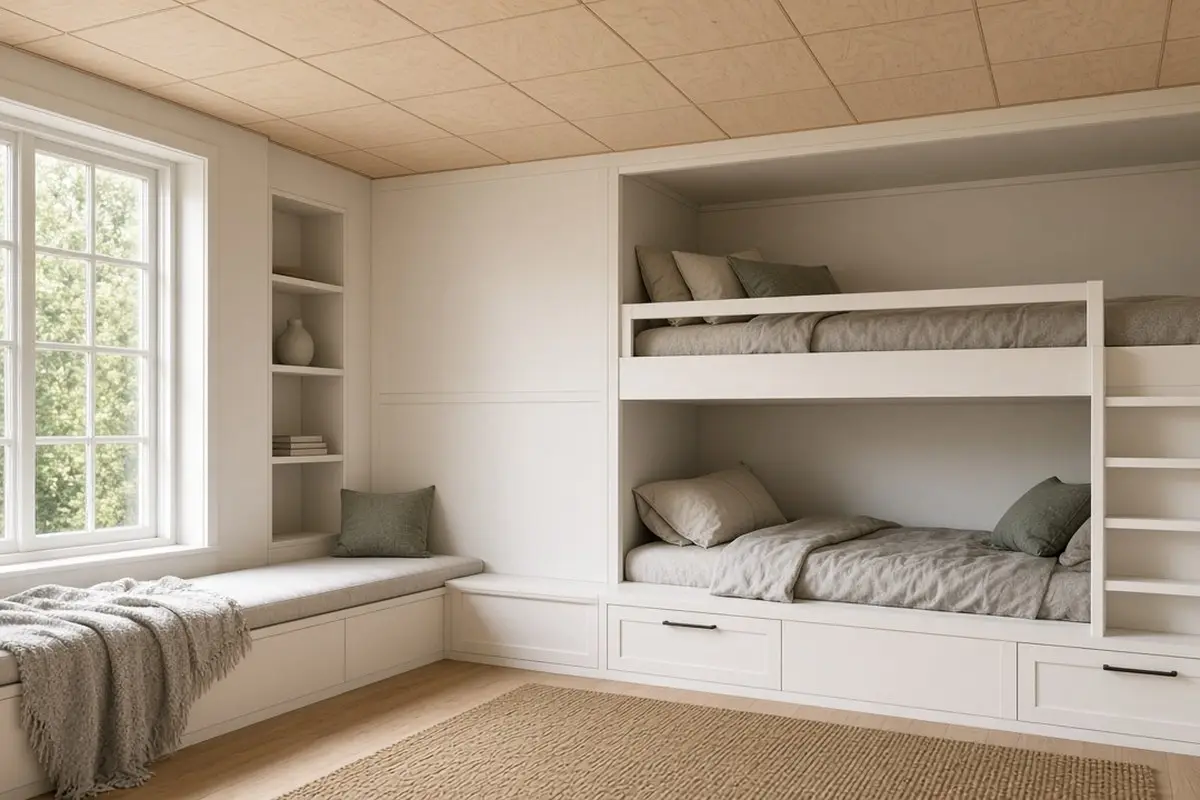
A birch plywood ceiling with a clear, matte finish is a classic look for a bunk room. The pale wood brightens a room with small windows, and the grid of panels gives a gentle, calming structure overhead.
Use a water-based clear finish, which yellows less than oil-based products and keeps the birch pale. A matte or satin sheen shows the grain without glare. Finish both faces and all edges before installation.
Pair the ceiling with simple white or painted bunks, and keep the walls light so the wood is the main warm feature.
Get the look
2. Reveal joints for a modern look
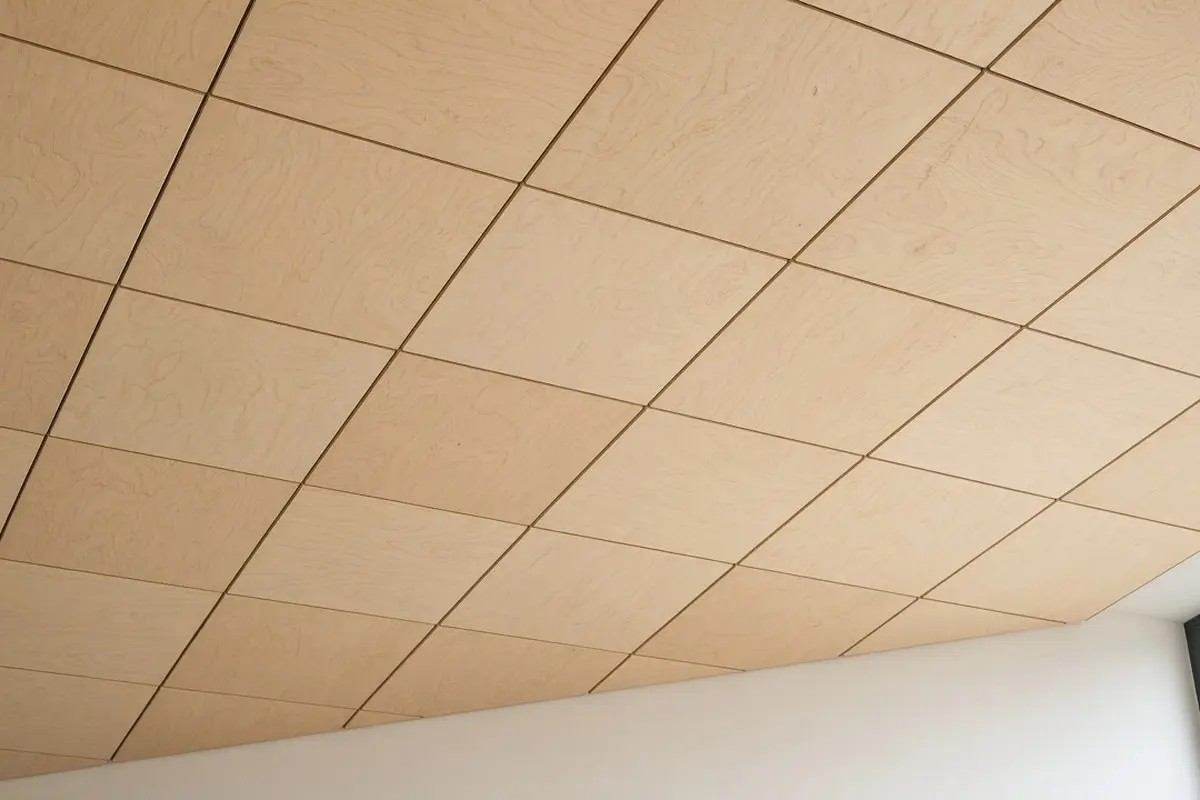
Instead of butting panels tightly together, leave a small gap, called a reveal, between each one. A gap of about an eighth to a quarter inch creates a crisp shadow line that hides small variations in the panel edges and makes the grid look clean and modern.
To keep reveals even, use spacers between panels during installation, such as scraps of hardboard of the right thickness. Paint the backing behind the gaps black or a dark gray so the reveal reads as a shadow rather than a view of the structure.
Get the look
3. Battens over the seams
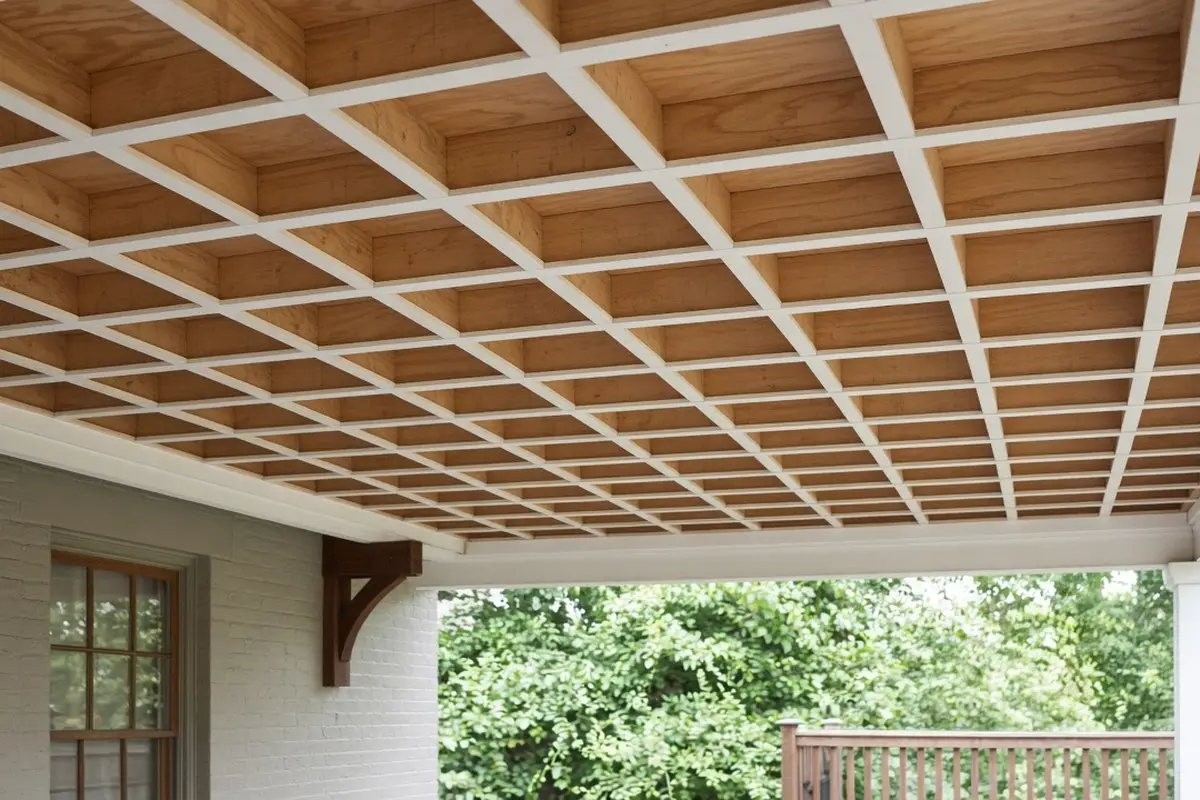
For a cottage or cabin feel, cover the seams with thin wood battens instead of leaving reveals. Narrow strips of wood, about 1 to 2 inches wide, form a grid over the panels and hide uneven joints. This method is forgiving for beginners, since the battens cover small gaps and cutting errors.
Finish the battens the same as the panels for a subtle look, or paint them white for a classic contrast. On a porch, this style pairs well with a painted beadboard wall or simple trim.
Get the look
4. A warm stained porch ceiling
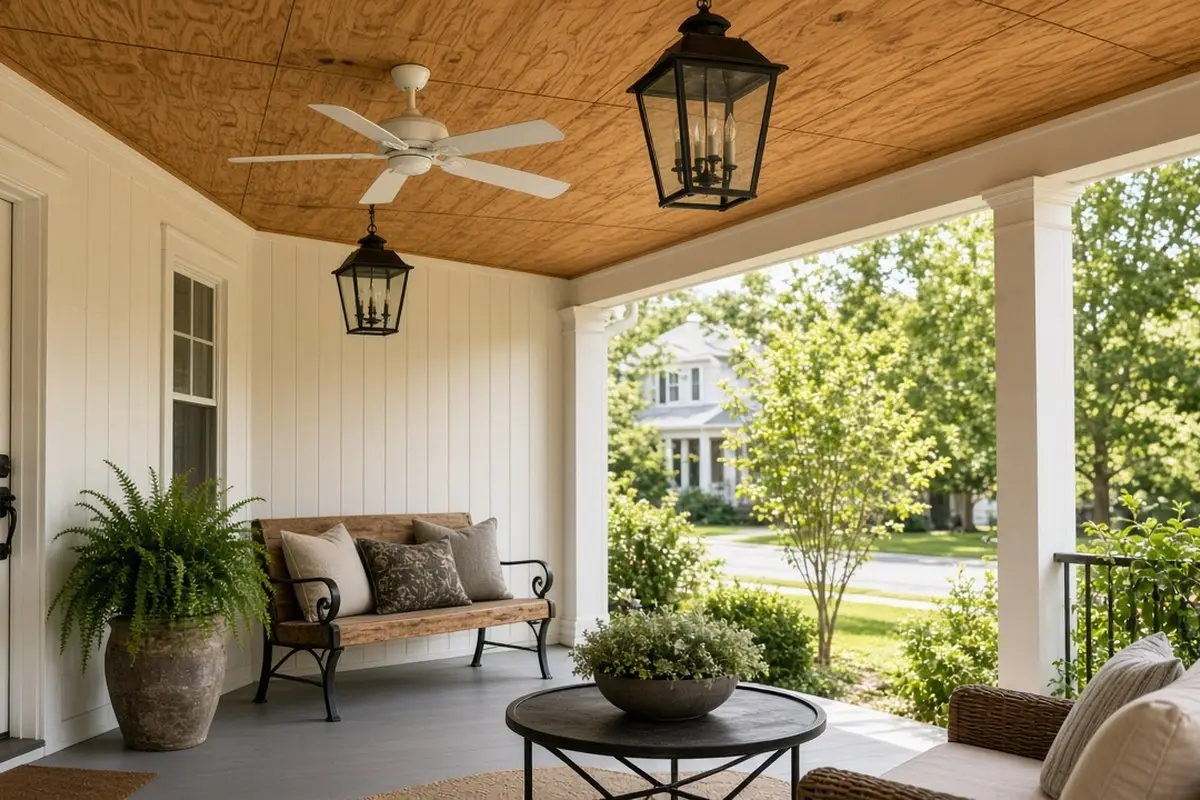
On a covered porch, a plywood ceiling stained in a warm honey, cedar, or walnut tone feels rich and inviting, especially in the evening light. A darker stain also hides small grain variations between panels.
Use exterior-rated plywood and a stain and topcoat designed for outdoor use. Prime or seal the backs and edges as well, since moisture can enter from behind and cause delamination. Even on a covered porch, wind-driven rain and humidity affect the panels.
Choose damp-rated light fixtures, and consider a ceiling fan rated for outdoor use. For porch furniture that suits a warm wood ceiling, see screened porch furniture.
Get the look
5. Painted plywood for a bright bunk room
If you like the panel grid but not the wood tone, paint the plywood. A painted ceiling still shows the grid and a hint of grain texture, but in any color. White or a pale color keeps a small bunk room bright; a soft blue or green adds a playful note for a children’s room.
Prime with a stain-blocking primer, since some wood species bleed tannins through paint. Paint panels before installation, then touch up any fastener holes and edges afterward.
6. A plywood ceiling with a single beam
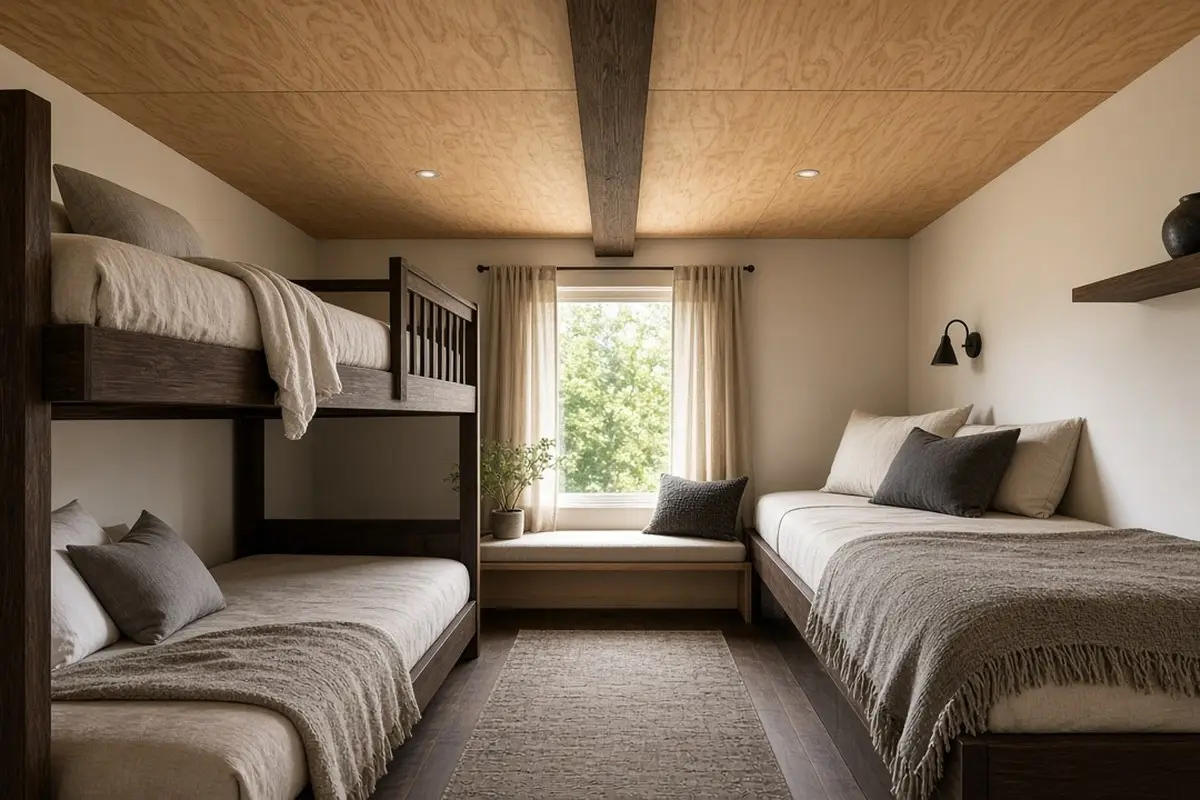
In a long porch or a narrow bunk room, a single beam running down the center adds structure and breaks up a large ceiling. The beam can be a real structural member or a decorative box beam made from three boards.
Finish the beam in a contrasting tone, such as a darker stain or a painted finish, so it reads as a separate element. Align the panel grid with the beam so seams meet it neatly.
Get the look
7. Lights recessed into the grid
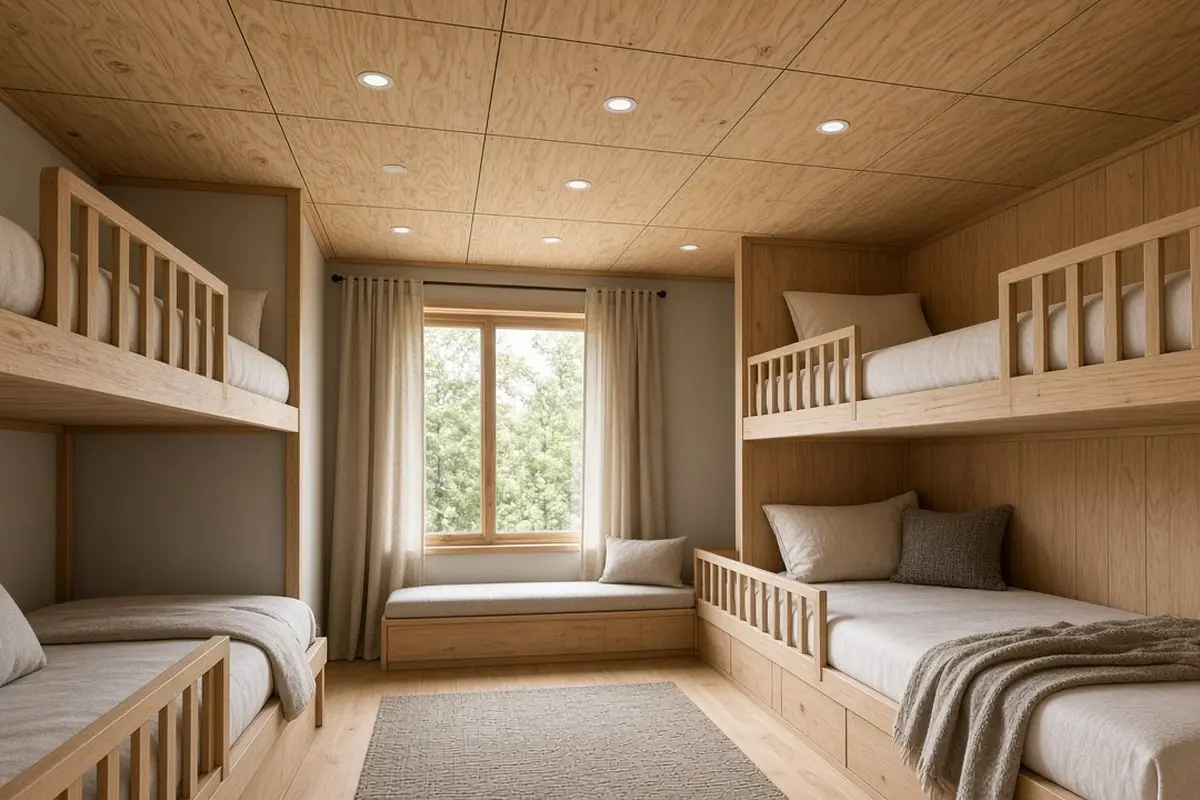
Plan lighting with the grid. Low-profile recessed lights, often called wafer lights, are thin enough to fit in many ceilings without deep housings and look clean in a plywood ceiling. Place them at the center of panels or in a regular pattern that follows the grid.
Before cutting, confirm the wiring path and fixture locations with an electrician. Use fixtures rated for the location: damp-rated on a covered porch, and suitable for contact with insulation where needed.
In a bunk room, add reading lights at each bunk so the overhead lights are not the only source. Small wall sconces or clip-on lights work well.
Get the look
8. A plywood ceiling over a sleeping loft
A plywood ceiling is a natural fit for a sleeping loft or a low attic bunk room, where a sloped ceiling follows the roofline. Panels can be cut to follow the slope, with the grid running parallel to the roof ridge.
Insulation and ventilation matter in a loft. Before covering the rafters, confirm the space is properly insulated and has ventilation, since a finished ceiling makes these hard to change later. A building professional can advise on what is needed for your climate.
Fastening panels overhead
Plywood panels must be firmly fastened to framing, since a sagging panel is noticeable and can become a hazard.
- Use screws or ring-shank nails into joists or furring strips, at the spacing the panel manufacturer recommends.
- Add construction adhesive for extra hold, but never rely on adhesive alone overhead.
- Plan the fastener pattern. In a clear-finished ceiling, fasteners show. Space them evenly in neat lines along each edge and across the field, so they become part of the pattern. Countersunk screws with matching finish washers can look intentional.
- Use panel lifts or helpers. Even thin plywood is awkward overhead. A rented drywall lift or two support poles makes installation safer and faster.
Wear safety glasses and use a stable ladder or scaffold. Working overhead is tiring, so take breaks.
Finishing tips
- Finish before installation. Coating panels flat on sawhorses is much faster and gives a better finish.
- Seal all faces and edges. This reduces warping and moisture movement.
- Sand lightly between coats with fine sandpaper for a smooth finish.
- Touch up after installation. Fill fastener holes, touch up any scuffs, and apply a final light coat if needed.
Care and maintenance
Plywood ceilings need little care. Dust them occasionally with a soft brush or vacuum attachment. On a porch, rinse gently with a hose and soft brush to remove pollen and cobwebs. Recoat exterior finishes every few years, depending on exposure.
Check porch ceilings each spring for any signs of moisture, such as stains, swelling, or peeling, and address the cause promptly.
Quick answers
Is plywood strong enough for a ceiling? Yes, when properly fastened to framing. Use the thickness and fastener spacing appropriate for the joist spacing.
Can I install plywood over an existing drywall ceiling? Often, yes, by fastening through the drywall into the joists. Check the drywall is sound first.
Which plywood looks best? Cabinet-grade birch or maple for a pale, modern look; pine for a rustic look; exterior-rated panels for porches.
A warm ceiling on a budget
A plywood ceiling gives a porch or bunk room the warmth of wood without the cost of solid planks. Choose good panels, plan a clear grid, and finish them well, and the ceiling will look deliberate for years.